Step 1
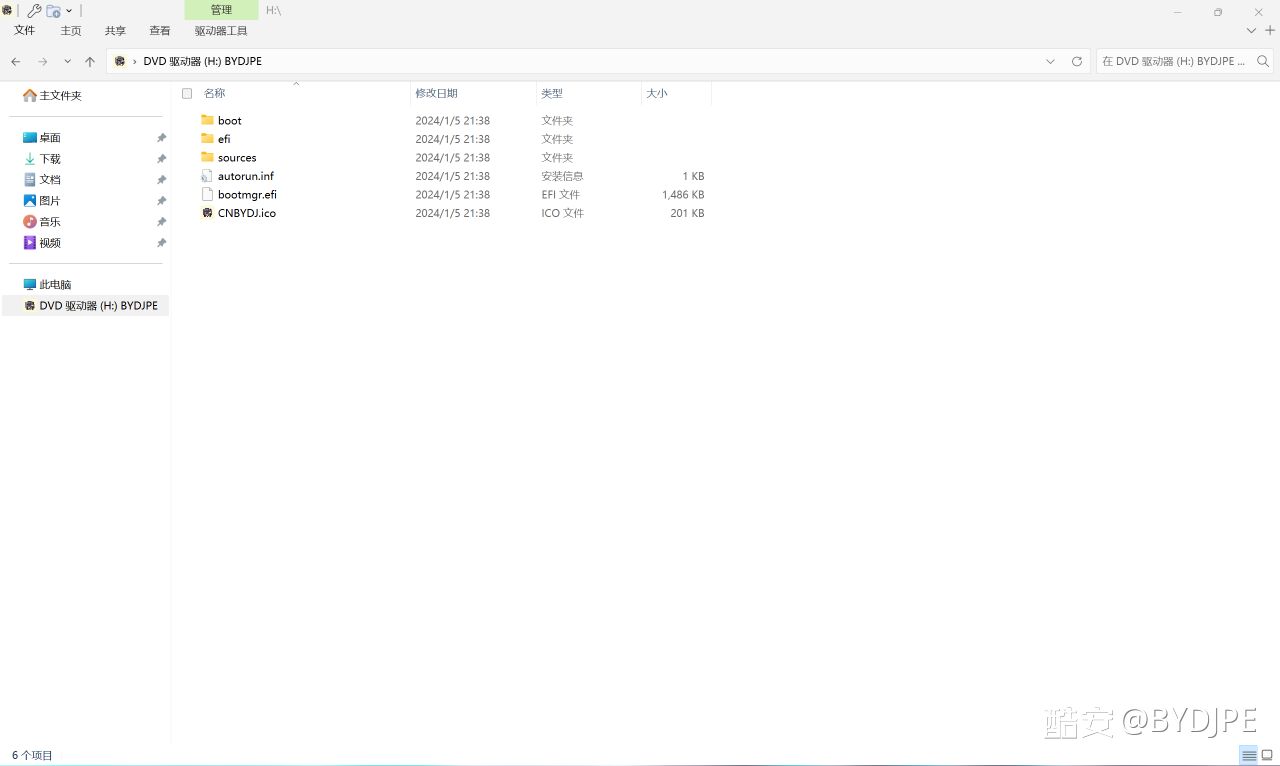
Double-click the PE ISO to open it. If you downloaded a WIM file, go straight to Step 2.
The original screenshots use the Chinese interface. The instructions below describe the same steps in English.
Required tool: Dism++
This guide applies to both third-party and official Windows PE images.
If PE already recognizes storage, USB devices, the touchpad and keyboard, retain the existing driver configuration. When additional drivers are needed, choose drivers that match the device, PE architecture and kernel version to maintain compatibility during startup and maintenance.
This guide recommends the Arm build of Dism++ on an Arm computer for servicing an Arm64 PE image with matching Arm64 drivers. For other host, tool and image architecture combinations, first check the support documentation for your Dism++ version. Application emulation does not replace kernel driver architecture requirements.
If you do not have the device’s driver files, export them with Dism++ first. Do not substitute an EXE driver installer for the exported driver files. Skip the export if you already have the files; otherwise, refer to the second screenshot in Step 4.
Double-click the PE ISO to open it. If you downloaded a WIM file, go straight to Step 2.
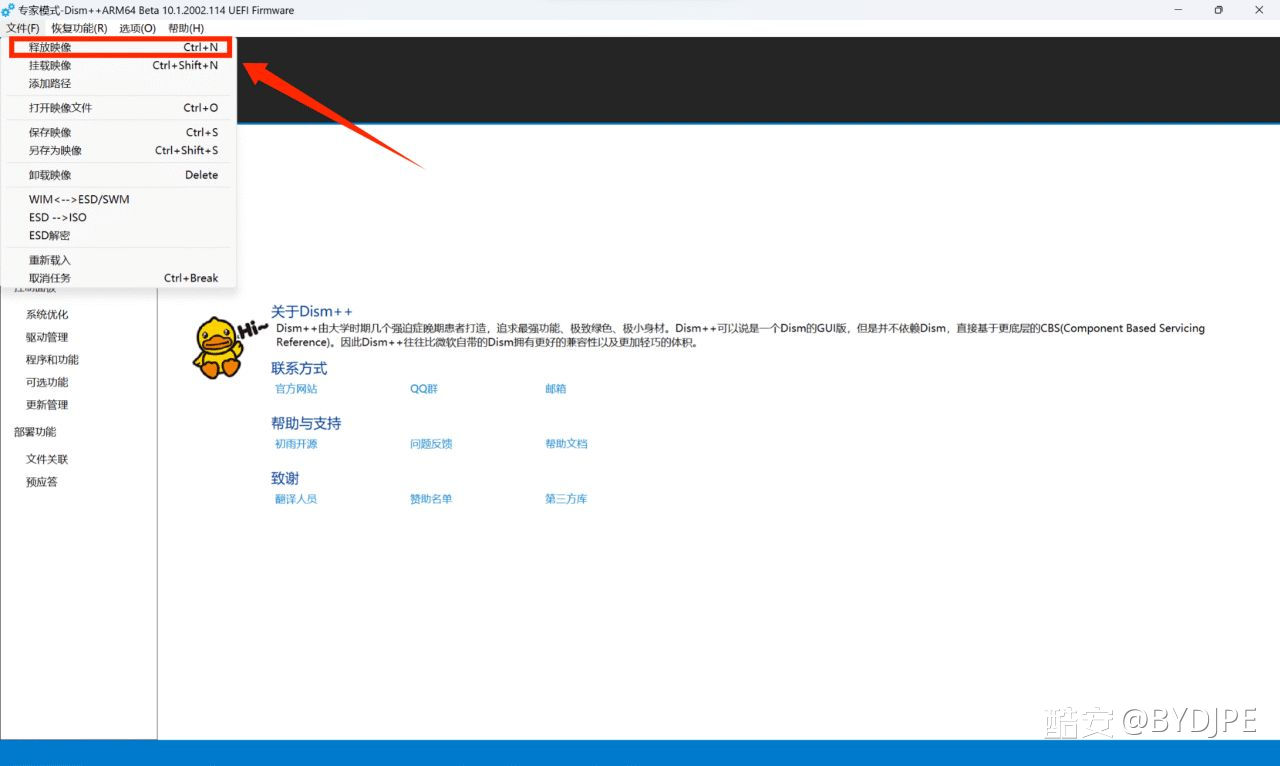
In Dism++, open File → Apply Image (Ctrl+N), then use the browse button to choose the WIM file, as shown below.
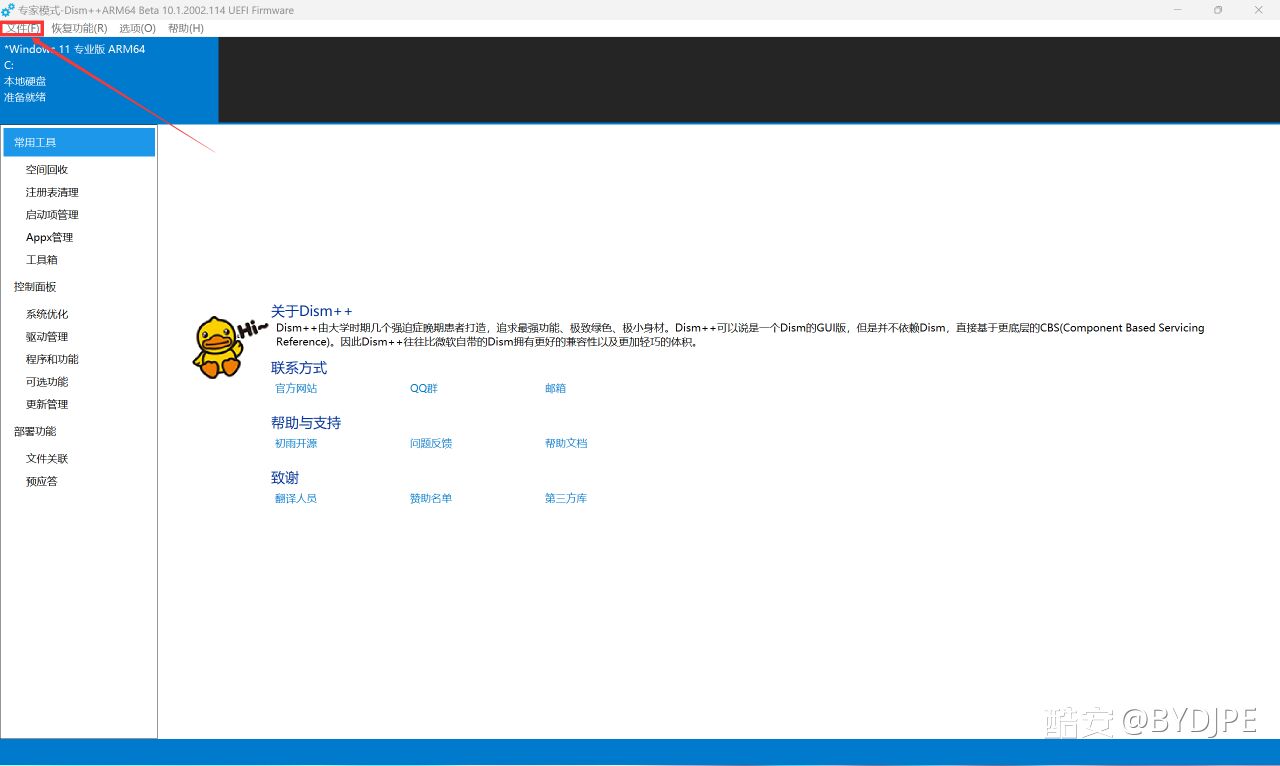
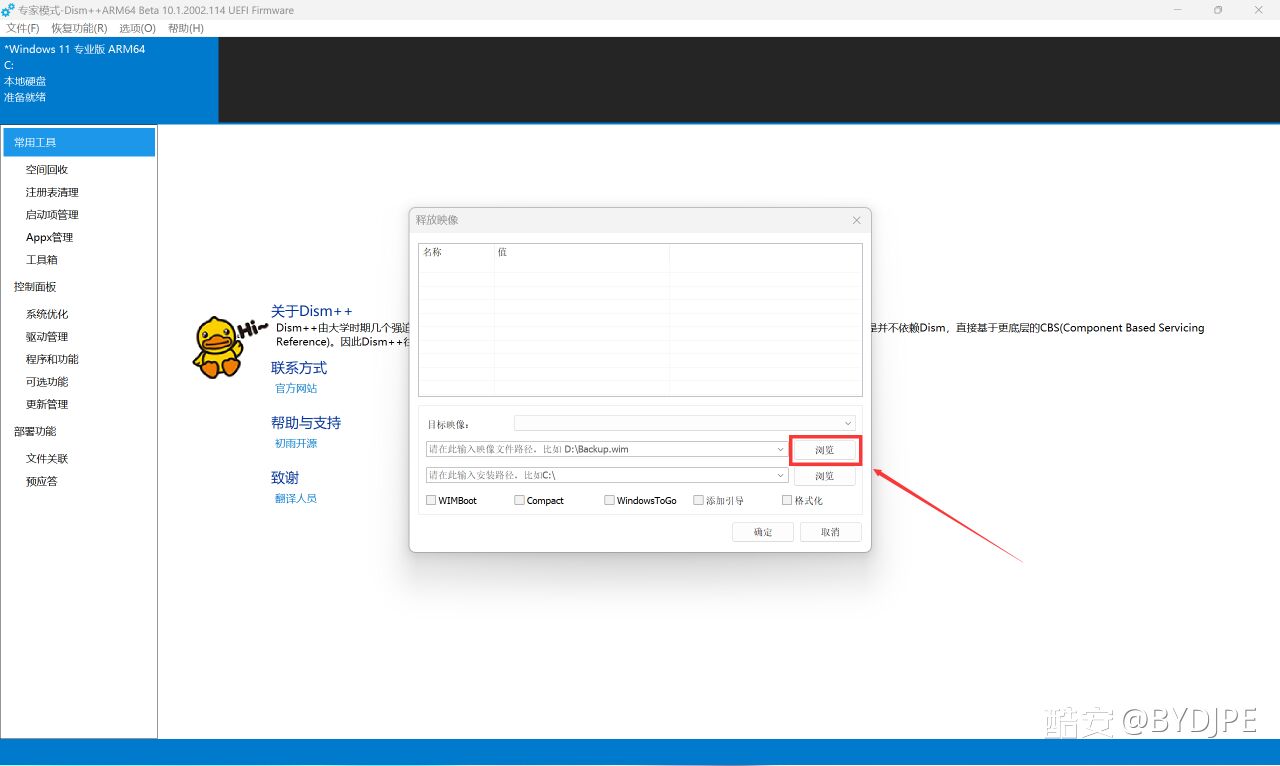
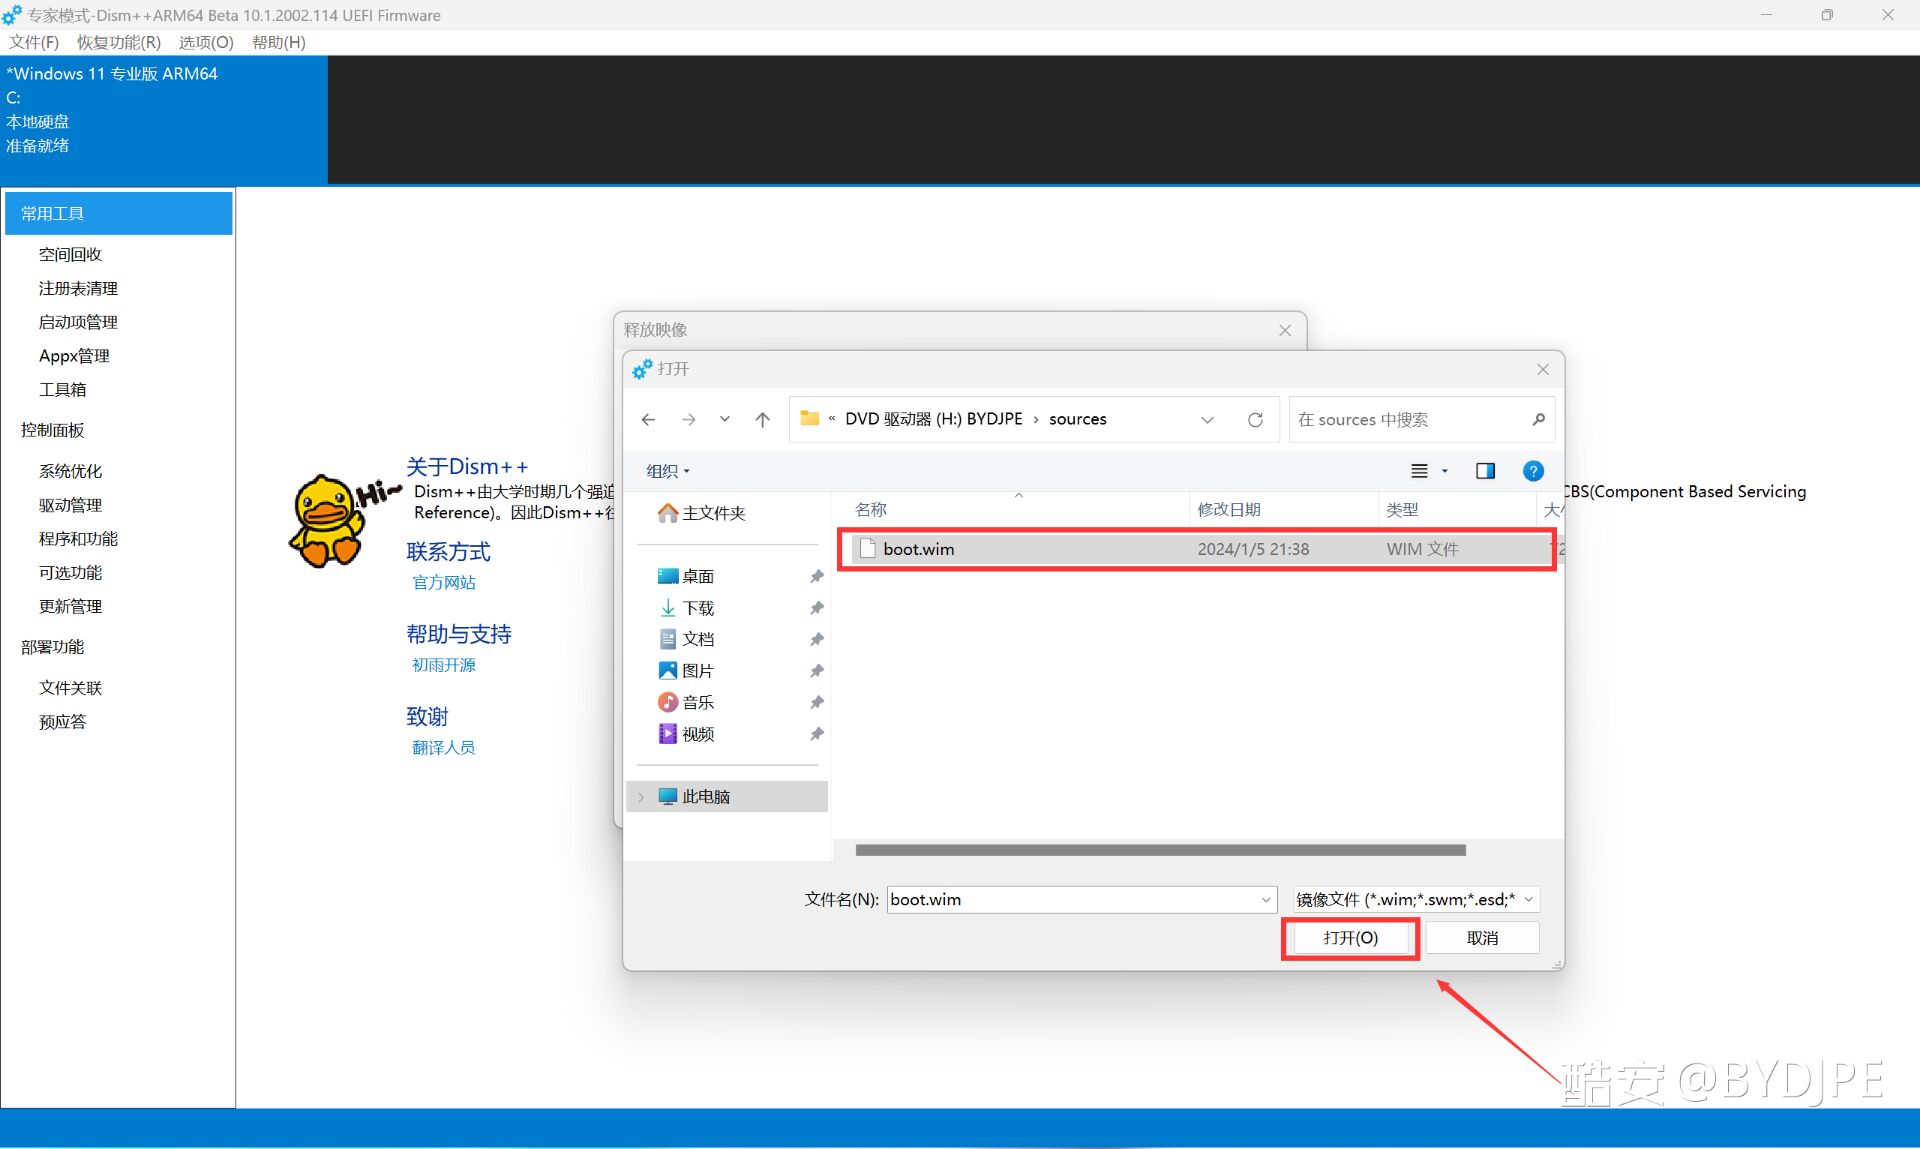
Locate and select the WIM file for your downloaded PE.
Choose a suitable folder for applying the image. Once you have finished, you can boot into PE to remove the extracted working files. The path shown is only an example.
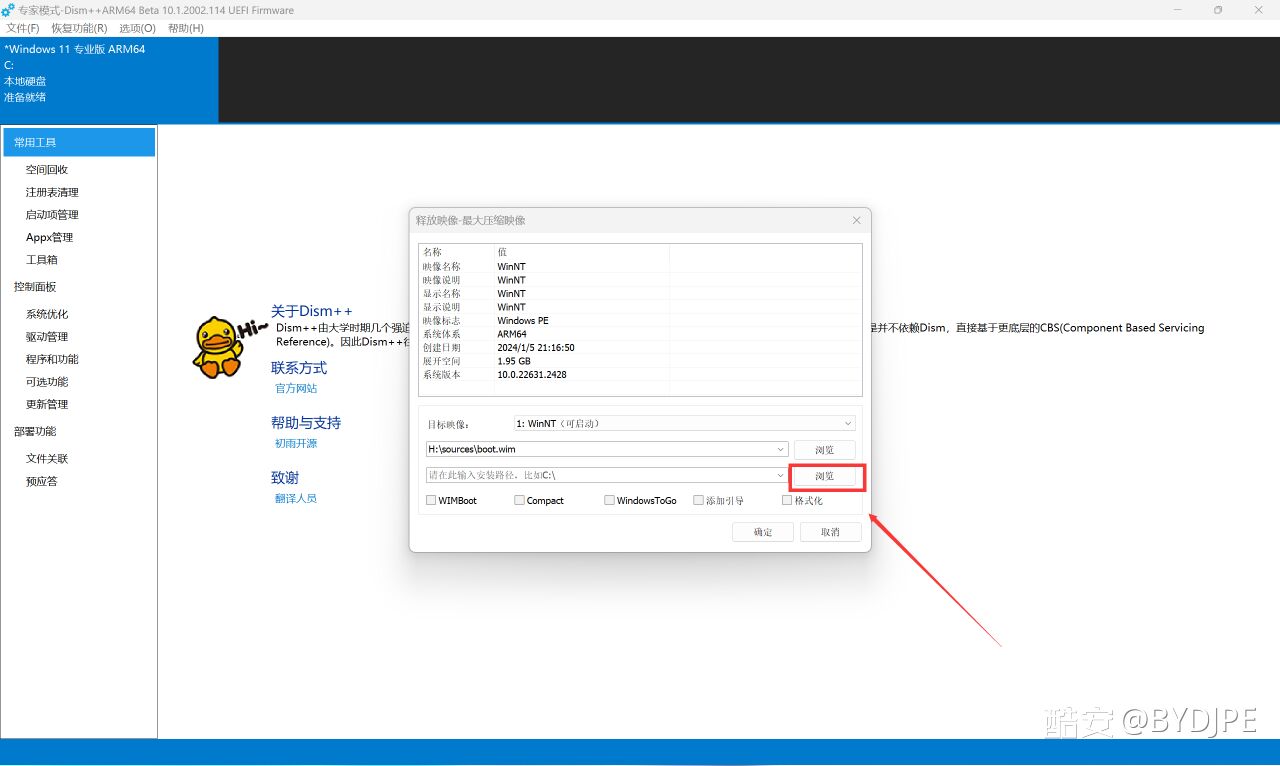
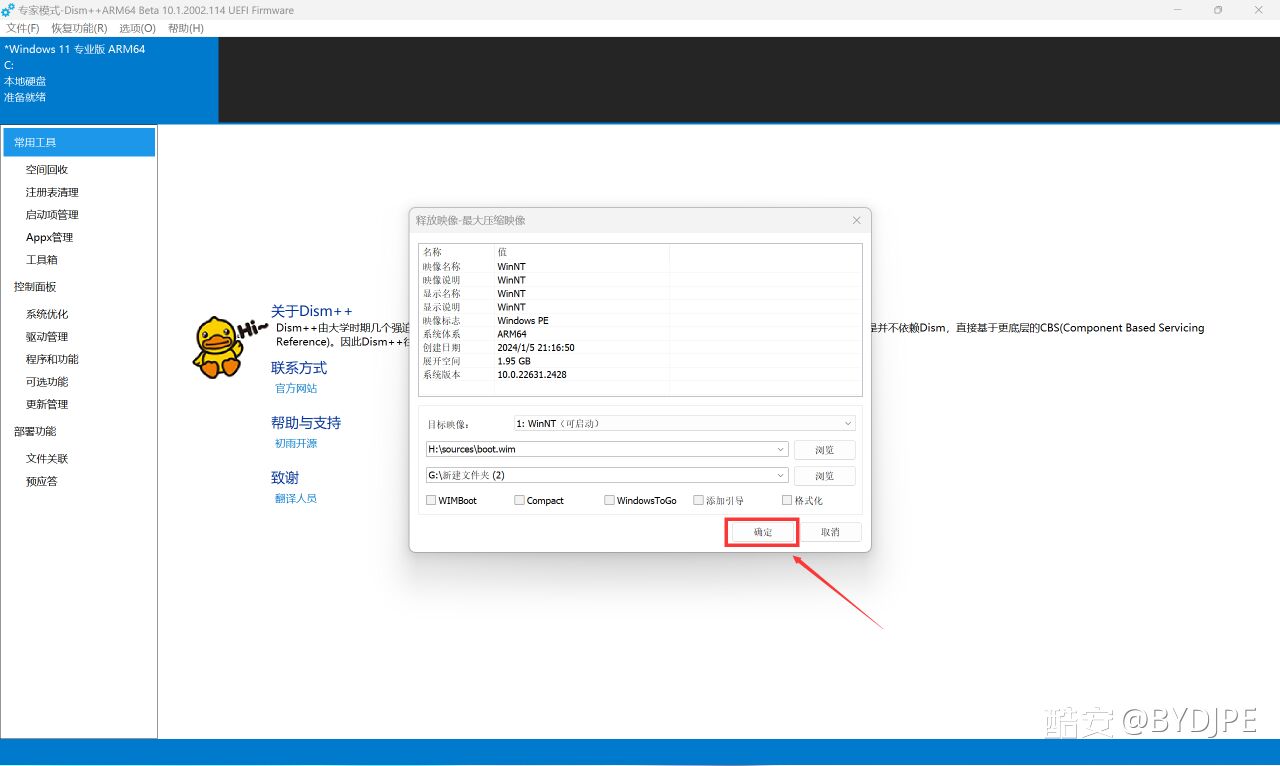
Wait for the image to finish applying.
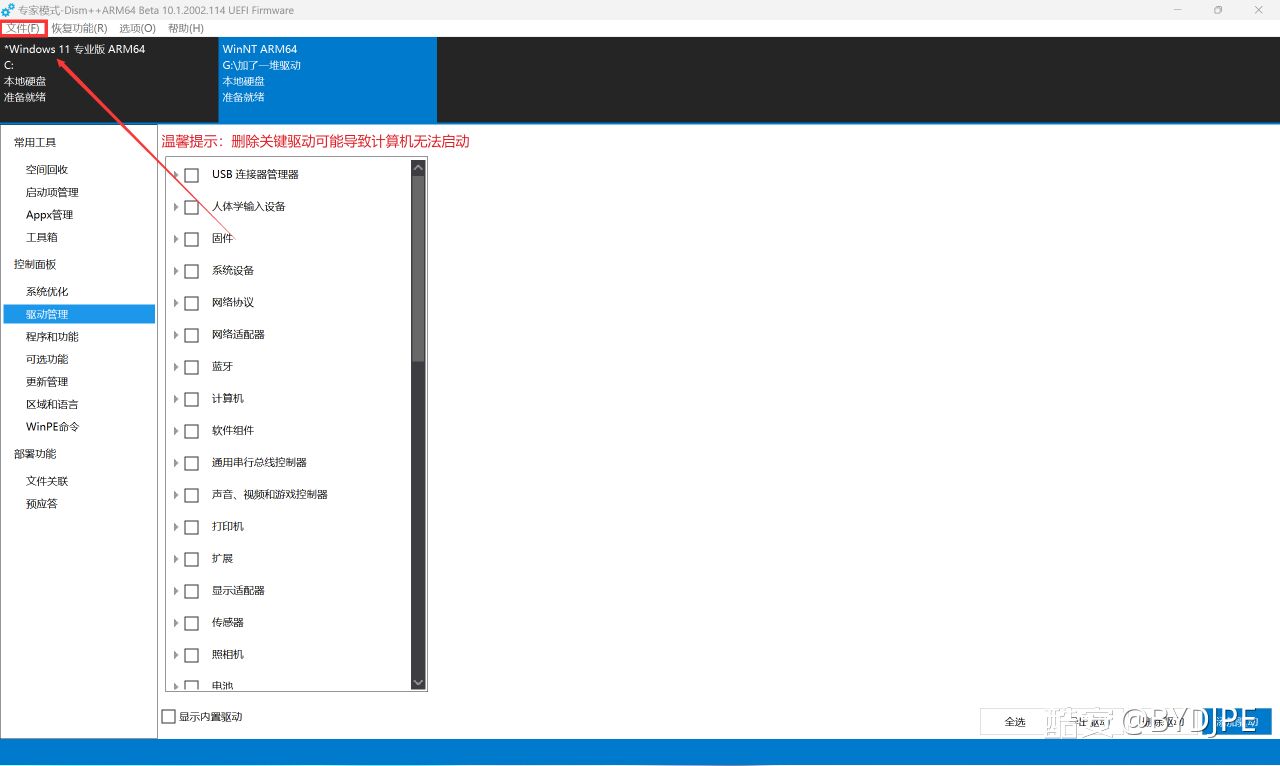
Select the image labeled “WinNT ARM64” at the top, open the driver management section, choose the option to add drivers, and select the folder containing your exported driver files.
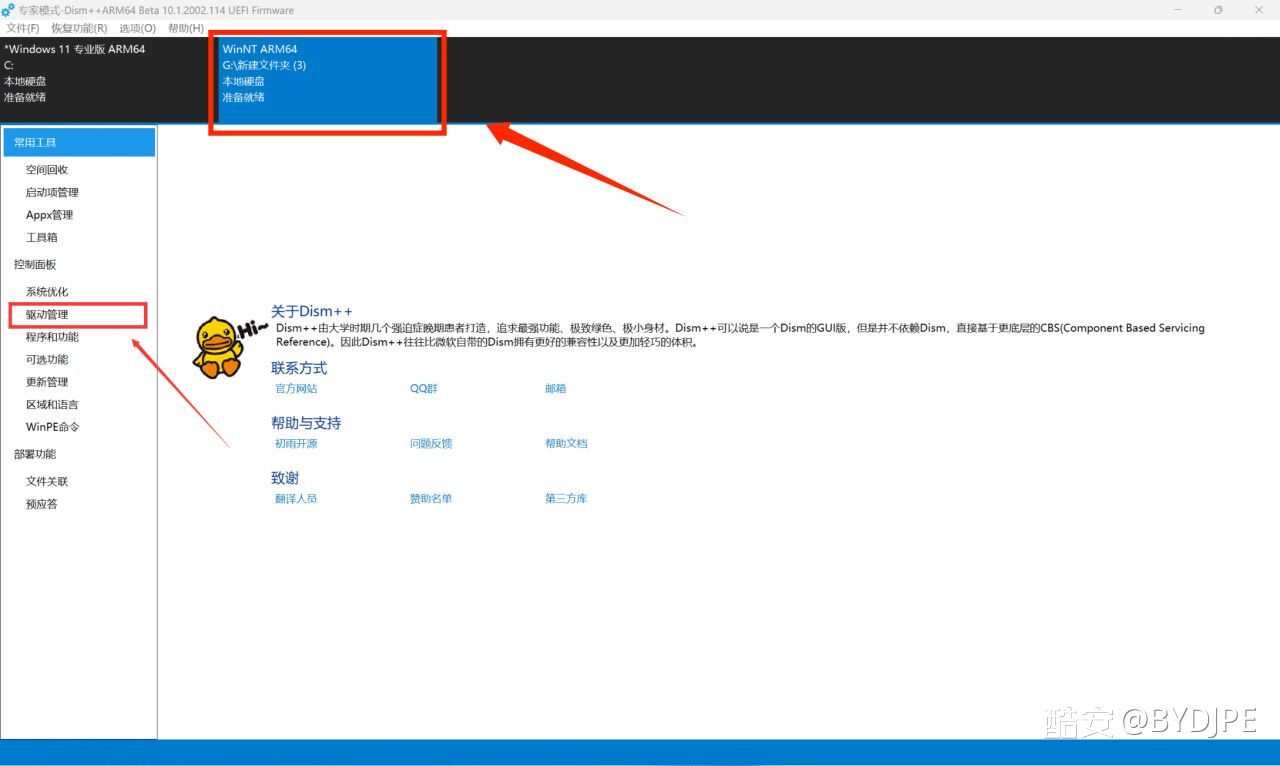
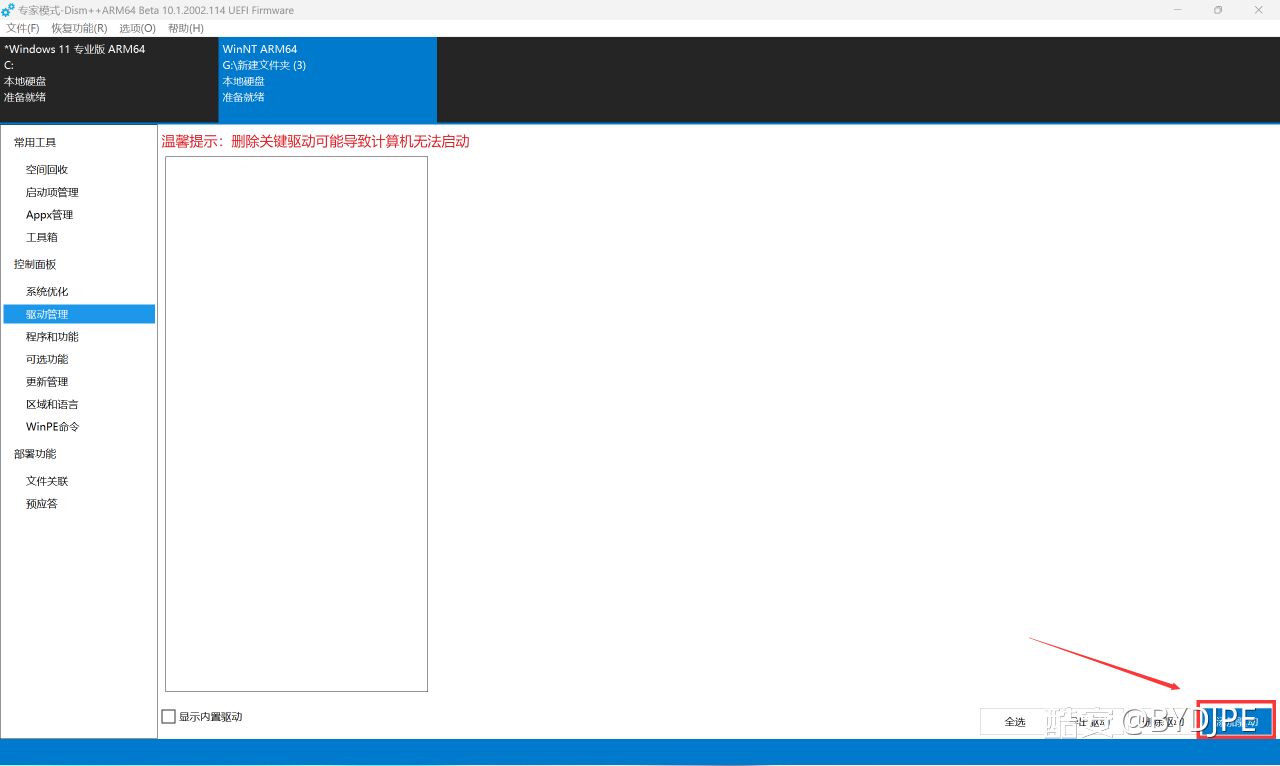
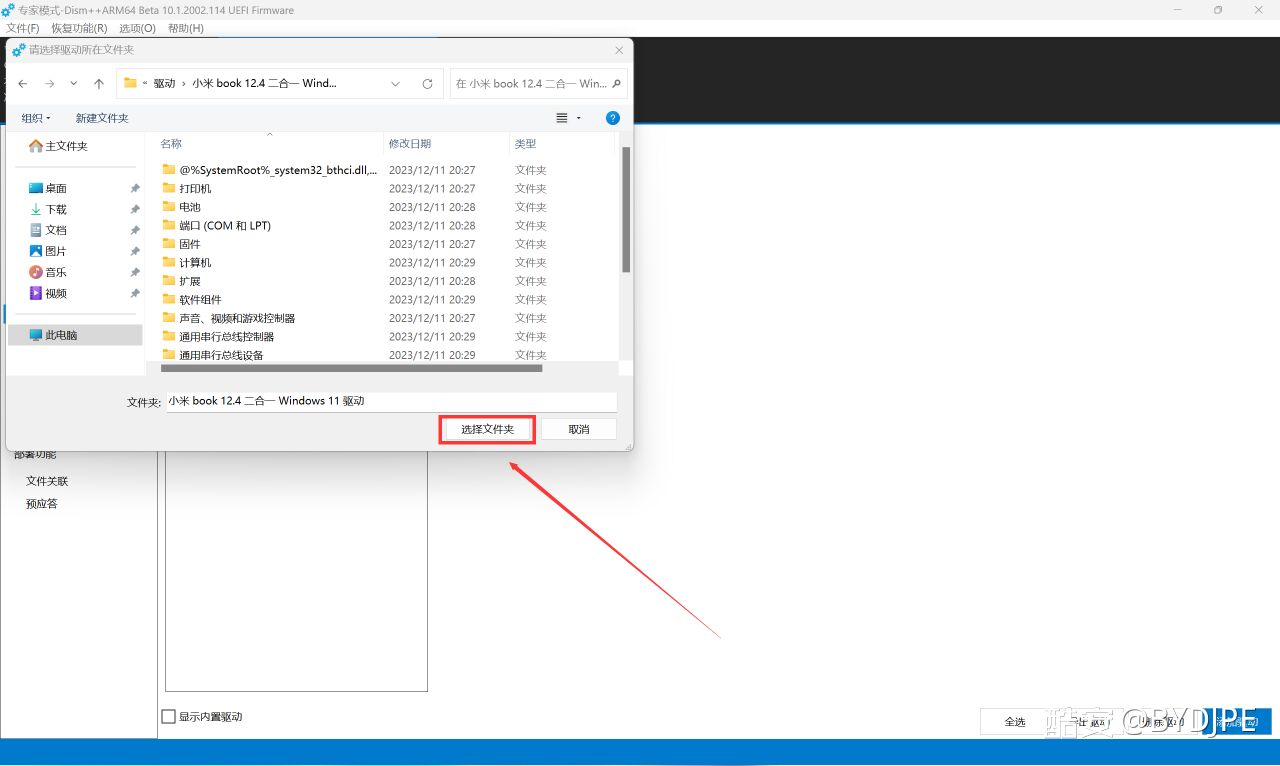
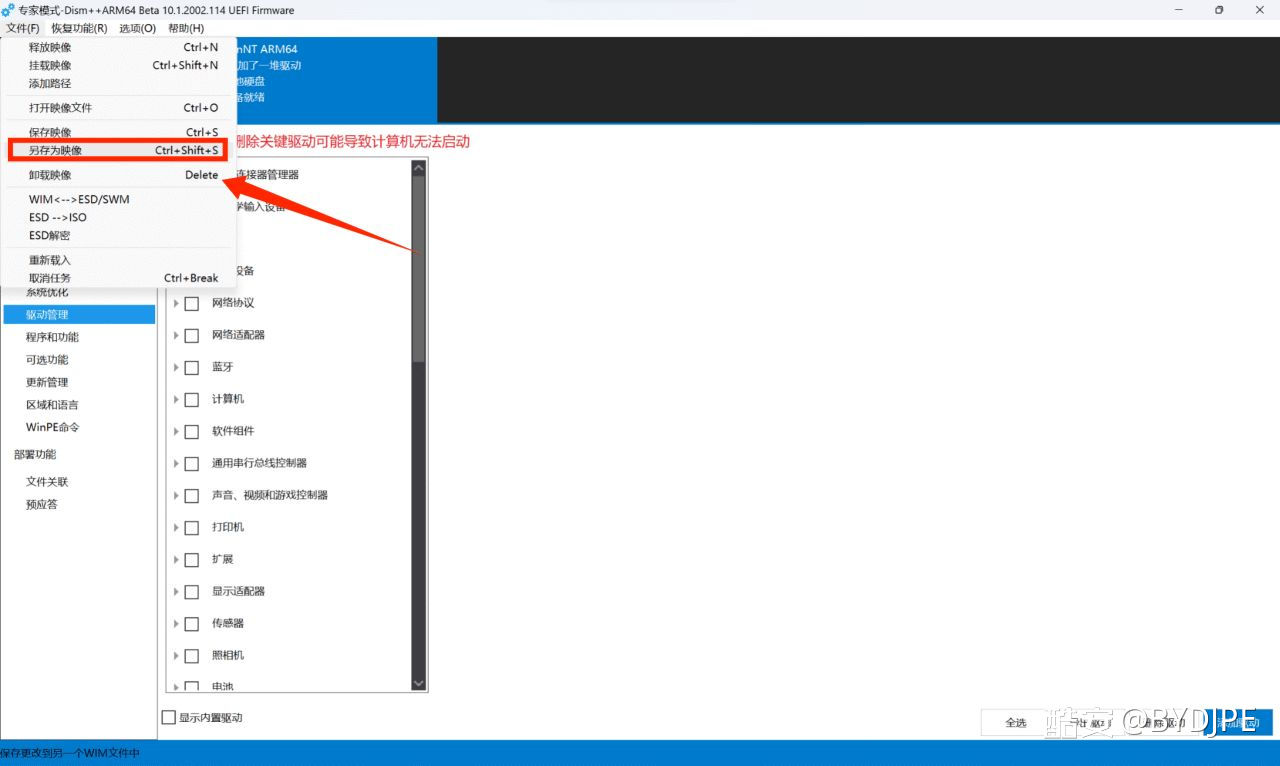
Wait for driver import to finish, then preferably save the modified image to a separate empty folder and keep the original download as a backup. If you extracted the ISO and need to replace boot.wim in the working folder, confirm that the original is backed up before removing the old working copy and saving the new image. This avoids appending an image to the original file or confusing the old and new files.
Open File → Save Image As (Ctrl+Shift+S), choose the output location and filename, and save the image. Your PE with the added drivers is ready when saving finishes. Before saving, check the output folder and filename, review the tool’s instructions and back up important data.